|
| Anniversary Sale! 22% off all patterns! |


|
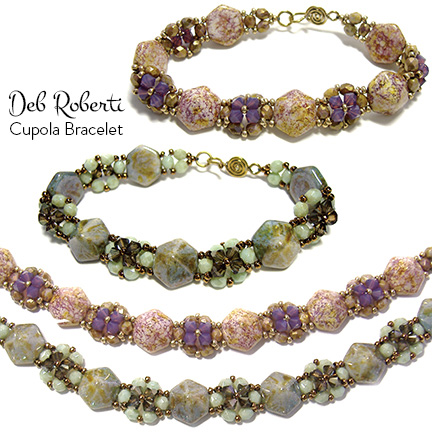
CUPOLA BRACELET (©2015 Deborah Roberti)
Links to exact beads used and more colorways at the end of the page. Note: This pattern is a variation of my free Pyramid Band. Although the Cupola Bracelet is made using 12mm Czech Glass Hex 2-Hole Beadstuds, it also works great with any size Czech Pyramid Beadstuds: 12mm, 8mm and 6mm (examples shown in the PDF and after the last step). MATERIALS
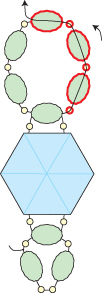
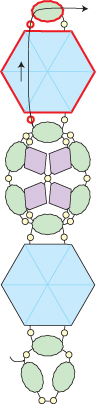
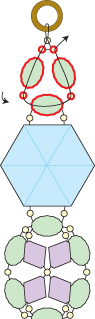
Step 1: Thread your needle with about 2.5 yards of FireLine or thread. String a fire-polished bead, two seed beads, a fire-polished bead, a seed bead, a fire-polished bead and a seed bead. Leaving about a 10-inch tail for attaching the clasp, tie the beads together with a double knot:
Step 2: Go back around through the beads highlighted in RED:
Step 3: String a seed bead. Go up through the left side of a Hex Beadstud. String a seed bead, a fire-polished bead and a seed bead. Go around and down through the right side of the Hex Beadstud that you just strung. String a seed bead and go across through the fire-polished bead that you exited at the end of the last step (highlighted in RED):
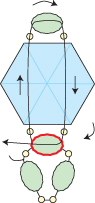
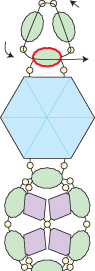
Step 4: The Hex Beadstuds are heavy so go back around through the beads that you added in the last step (highlighted in RED):
Step 5: Go back up and around through the seed bead, the left side of the Hex Beadstud, the seed bead and the fire-polished bead highlighted in RED:
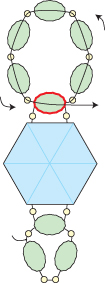
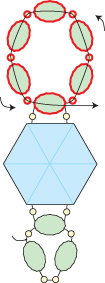
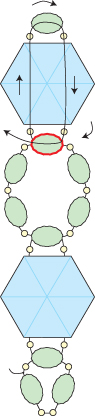
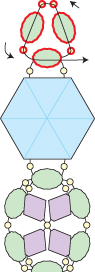
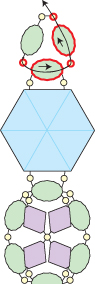
Step 6: String a seed bead, a fire-polished bead, a seed bead, a fire-polished bead, a seed bead, a fire-polished bead, a seed bead, a fire-polished bead, a seed bead, a fire-polished bead and a seed bead. Go around and back across through the fire-polished bead that you exited at the end of the last step (highlighted in RED):
Step 7: Go back around through the beads that you added in the last step (highlighted in RED):
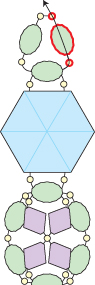
You’ve just created a base circle of seed beads and fire-polished beads. Later, in Step 11, you’ll add a layer of seed beads and bicone crystals that will sit on top of this base circle. Step 8: Go back up and around through the beads highlighted in RED:
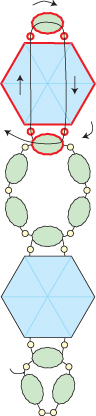
Step 9: String a seed bead. Go up through the left side of a Hex Beadstud. String a seed bead, a fire-polished bead and a seed bead. Go around and down through the right side of the Hex Beadstud that you just strung. String a seed bead and go across through the fire-polished bead that you exited at the end of the last step (highlighted in RED):
Step 10: Go back around through the beads that you added in the last step (highlighted in RED):
Now you’ll add a layer of seed beads and bicone crystals that will sit on top of the base circle of seed beads and fire-polished beads that you created in Step 6.
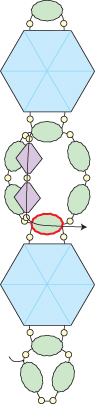
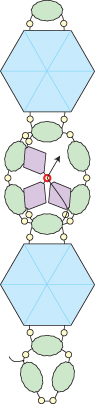
Step 12: String a seed bead and a bicone crystal. Go back up through the seed highlighted in RED, drawing the seed bead toward the center so that the bicone crystals start to form an “x”:
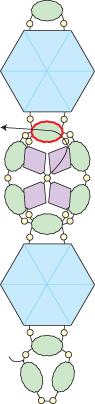
Step 13: String a bicone crystal and a seed bead. Go back across through the fire-polished bead highlighted in RED. Pull tight so the bicone crystals form an “x”:
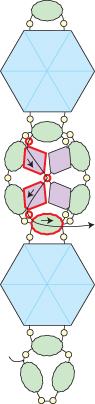
Step 14: Go back down and around through the seed bead, the bicone crystal, the seed bead, the bicone crystal, the seed bead and the fire-polished bead highlighted in RED:
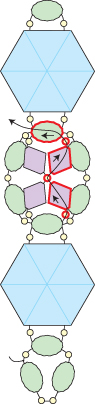
Step 15: Go back up and around through the seed bead, the bicone crystal, the seed bead, the bicone crystal, the seed bead and the fire-polished bead highlighted in RED:
Step 16: Go back up and around through the seed bead, the left side of the Hex Beadstud, the seed bead and the fire-polished bead highlighted in RED:
Step 17: Repeat Step 6 to Step 16 until your bracelet is the length you want it, minus about a quarter-inch and the length of your clasp:
Step 18: To attach one end of the clasp, string a seed bead, a fire-polished bead, two seed beads, a fire-polished bead and a seed bead. Go around and back across through the fire-polished highlighted in RED:
Step 19: Go back around through the beads that you added in the last step (highlighted in RED):
Step 20: Go back up through the seed bead, the fire-polished bead and the seed bead highlighted in RED:
Step 21: String a seed bead. Go through the clasp and then back down through the seed bead that you just strung. Continue on around through the beads highlighted in RED:
Step 22: Go back around through the beads highlighted in RED and the clasp several times:
Weave back into the bracelet, knot in several places and then cut your thread.
Repeat Step 21 and Step 22.
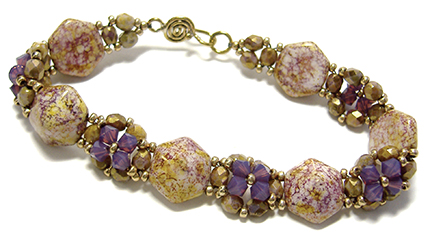
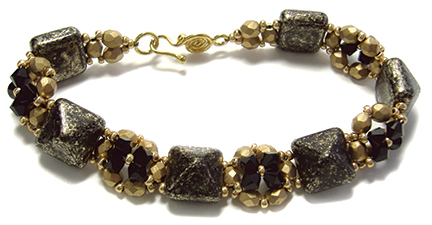
Beads Used in the photo above and the PDF:
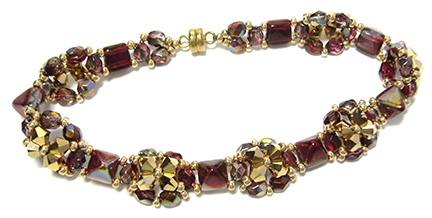
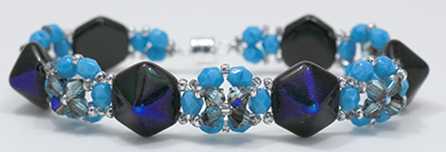
Purple Hex version
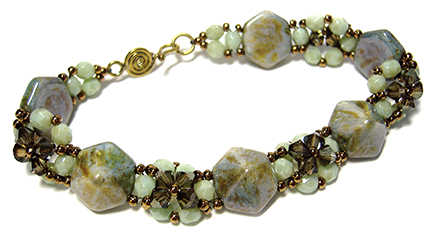
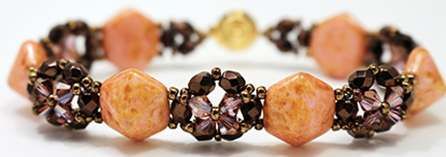
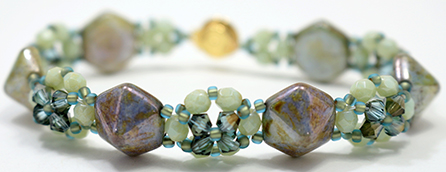
Green Hex version Although I instruct you to use 12mm Hex Beadstuds, any size Beadstuds will work with this pattern.
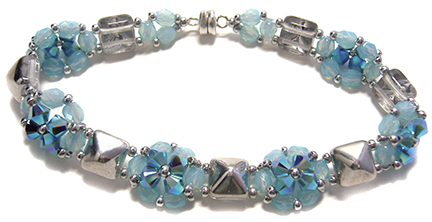
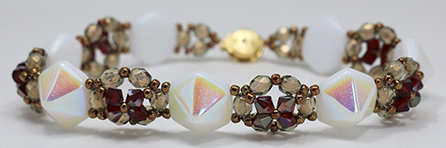
Here is the same pattern using 12mm Pyramid Beadstuds (the largest):
8mm Pyramid Beadstuds:
and 6mm Pyramid Beadstuds (the smallest): Betsy at RedPandaBeads.com beaded up some more Cupola Bracelets for her Gallery of Color Suggestions. Just click on a picture to see the actual beads used:
|